Research Assignment – Texturing Pipelines using dDo cont. (1)

Image

I’ve created a normal map to use with dDo (as required). This will be briefly mentioned in my tutorials as a prerequisite, but I will not be showing the process of making the map in any of the videos in order to save time. I intend to keep the normal map simple to better show the power of the dDo software. The map is 2048 x 2048 (will be scaled down for in-game final shots).

Research Assignment – Texturing Pipelines using dDo

For my Year 2 research assignment, I have decided to create a quick video tutorial series explaining and demonstrating 3 texturing styles that can be achieved using the Quixel dDo texturing package.

Quixel’s dDo is a piece of software aimed at helping 3d artists realistically texture 3d assets very quickly. It can be used for any 3d object, but is better suited to probs or objects rather than characters or larger environments. Although it is very powerful at what it does and one can completely texture a full asset within minutes, I have found personally that you can get better results if using it strictly for dirt/detail passes. However, entire styles can be achieved if the proper dDo pipeline is followed. I wish to demonstrate three complete styles in short videos using a single asset (see image at bottom).

Hand painted: This will be a 10 minute tutorial video showing the material presets, their values and any additional detail options used to achieve a hand painted look. This is the most difficult of the three styles to achieve, as true hand painted textures speak for themselves. This video will take note that hand painted textures are almost always diffuse only, so manual Photoshop work will be needed to enhance the dDo result.

(Video will be condensed into 3 minutes using cuts and fast forward to fit into the 10 minute presentation time limit)

Realistic: This will be a 30 minute tutorial video showing the material presets, their values and any additional detail options used to achieve a realistic look. Video will explain what is required to begin using dDo, demonstrate a useful pipeline of iteration using Autodesk Maya and attempt to cover the many features of dDo.

(Video will be condensed into 4 minutes using cuts and fast forward to fit into the 10 minute presentation time limit)

Stylised: This will be a 10 minute tutorial video showing the material presets, their values and any additional detail options used to achieve a particular stylised look (cyberpunk, steampunk etc). This will be chosen personally by me, and will be more of a broad explanation of how someone may achieve a more stylised look to their 3d assets, rather than specifics on my chosen look.

(Video will be condensed into 3 minutes using cuts and fast forward to fit into the 10 minute presentation time limit)

Image

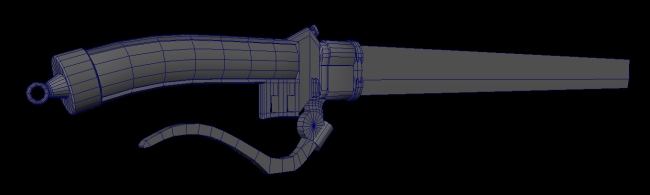
Katana Weapon (Attack on Titan anime) – 2400 tris

Prototype 4:

In week 4, my group set out to prototype a 3D platformer game where the goal is simply to reach the end of the level, collecting items along the way, much like retro platformer games.

The player’s end goal is to rid the world of corruption, and restore it to its former state of joy. Its intended audience is children.

For this prototype, I created several character and asset concepts, as well as in-game 3D assets for use in the level.

Prototype 2: Orbital Defense

In week two, my group prototyped a top-down single-screen survival game intended for touch based platforms. The player controls the Earth, and uses a swipe gesture to destroy incoming enemy ships with orbiting debris.

I was tasked with creating the UI for the game, including the in-game interface, a pause menu and the power-up menu.ImageImageImageImage

Above is an in-game screenshot from the latest Unity Build.

Prototype 3: Ace Machines

For my group’s third prototype we created a racing game themed in a steampunk style. It was intended to be a multiplayer racer for mobile devices, featuring power-ups, track-specific traps and vehicle customisation.

I was given the task of creating the game’s UI, which can be seen in the below image.ImageImageImage

The above two images are in-game screenshots from the latest Unity build.

Prototype 1: Morph Ball

For my group’s first prototype we created a simple 2D sidescroller where the player controls a ball that can transform into different shapes in order to overcome puzzles and complete levels in the fastest time possible.

I was in charge of creating the 3d mockup of a tutorial-like level that we would show in our game.ImageImageImageImageImageMB

The first 5 images are screenshots of the level in Maya; the final image is a screenshot running in a Unity build.


Game Brainstorm Choices

1. Morph Ball – 2d sidescroller

2. Swamp Runner – endless running game

3. Steam Punk Racer – racing game

4. Jet Baby – endless sidescroller flying game

5. Vertical sidescroller – 2d endless falling game

6. Mental Break Out – top-down capture-the-object game

7. Spawn & Consume – Eat to grow in size and avoid being eaten

8. Criminal Territories – RTS with different criminal factions at war

9. Dungeon Horde – wave-based multiplayer survival game

10. Rainbows of Death – FPS deathmatch game set in an infant girl’s dream universe

Clown Character – Major Assessment II

ImageImageImageImage


Here is the final render of my latest character. The character is a double-amputee clown who gets around by way of a leg brace and crutches. It is designed as a horror villian, one that would chase the player in a figurative horror game.

Modelled in Maya, sculpted in Zbrush, Retopology and UV unwrapping in 3D Coat. High-to-Low baking in Maya. Texturing in dDo, Photoshop and Mudbox. Rigged and Skinned in Maya. Rendered in Marmoset.

Stay tuned for animation and a playable Unity build.